Modern applications contains multiple components which communicates with each other. These components are different in behavior with input and output data requirements. In order to have the effective communication between the components , the communication platform should be good enough to offer loosely coupled behavior.
In this post, lets discuss about messaging platforms and how they best fit for different requirements using sample Java application
Messaging platforms:
Below are few messaging platforms.
- AWS SNS (Simple Notification Service)
- RabbitMQ
- Azure Service Bus
- IBM MQ
- Apache Kafka
Before we go ahead and decide about any messaging platform, lets understand basics.
what is the difference between messages and events
Messages: Messages contains the actual data and not the reference to the data. The sending and receiving application both understands the data within the message so, additional effort is not required to process the data.
Events:
Events are not like messages. Events are more like triggers. Sending and receiving applications can act on the events which they receive. So, it is like , if one application need some data from another application , events gets generated and applications response to that.
Events have following characteristics:
- It is more lighter than messages.
- Events can be sent to many receivers or none.
Now we understand the difference between messages and events, we need to decide which messaging platforms suits best for our need. Every messaging platform listed above either supports messages OR events but very few supports both. For example, in case of Azure cloud, Azure service bus is designed to handle the messages and Event grid is for event based communication.
Lets now focus on Azure service bus.
Azure Service bus topics, queues and relays.
what is queue:
Queues are temporary storage which stores the data. The sending application send the message to the queue and receiving application gets the message from that queue. Both these application have to subscribe to that queue. Under normal circumstances, there will be only one receiver. It provides high level of decoupling . Use queues when there is one to one communication.
what is topic:
Topics are same as that of queues but can have multiple receivers. Topics can have multiple subscriptions. The messages in the topic will be sent to multiple subscribers. Subscribers can decide which messages they should receive by applying filters . Topics also provides high level of decoupling . Use topics when there is one to many communication.
what is relay:
Relay is an object which performs the synchronous two way communication. Unlike, queues and topics , it is not a temporary storage. Use relays when you need bidirectional communication where you don’t want to buffer the messages. Relays are helpful in the scenarios where direct communication between components are required when they are on same network but separated using some network devices.
OK. Now, its time to create the practical stuff. For this blog post , we will use the Azure service bus as our messaging platform.
Follow the below procedure to create the Azure service bus namespace , queues and topics
- Refer this document to create Azure service bus namespace : Link
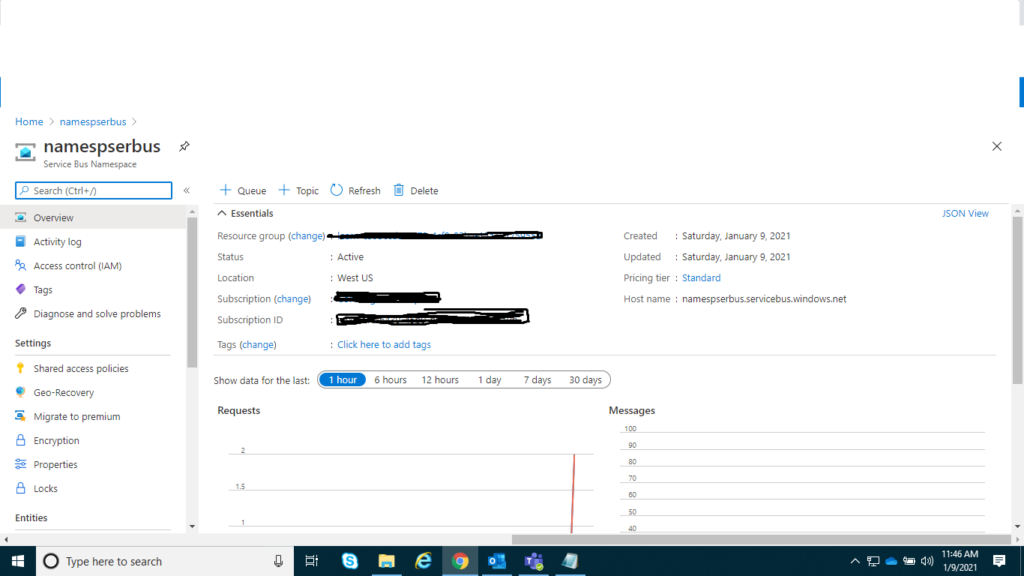
- Once the service bus is created, you should see the screen like below.
Good job. So far so good. Now, you have your first service bus namespace created. Follow the steps to create queues and topics.
- Go to the Overview page of the Azure service bus
- click on + Queue tab
- Enter the suitable name for Queue
- Keep rest of the option as it is
- click create.
Hurray !!! You have now created first queue. Under Entities section, you can see all the queues and topics in service bus.
You should see following screen for your newly created queues.

Now, create the connection strings in the queues. You may be wondering why connection strings are required., to connect service bus and associated queues. Connection strings are required to connect/integrate enterprise applications to communicate with Azure service bus.
Steps to create connection string:
- Click on queue which you created in above mentioned steps.
- Click on shared access policies under settings.
- click on + ADD button
- Give the name to the connection string
- Check the Manage option. (It is required to send and listen the messages in the same queue)
- click on create.
- Once done , record the primary connection string which is required to connect to queue in java application mentioned below.
After this, you have connection string setup for your queues in the service bus.
Further, lets create small console java application to connect to the queue and send/receive messages this queue.
Prerequisites:
- JDK 8 or later
- Eclipse IDE
- Maven 3 OR later
- Azure toolkit. Get the package from here
- Create the java console project
- Azure CLI. Please refer this guide to complete the java installation.
Steps to integrate Java application with Azure to access resources
- Create SP (Service Principal) using below command . Note: In order to create the SP , you need elevated permission, else the command will fail. Please contact the Active Directory Admin to grant you the permission if not adequate.
az ad sp create-for-rbac --name AzureSerBusSPonce the command is successful, it will show the JSON output. To view the SP in Azure portal, go to 1: Azure Active Directory – > 2: Select Enterprise Applications -> 3: Click Application Type to All Applications -> 4: Click Apply
- Configure the environment variable.
AZURE_SUBSCRIPTION_ID: Use the id value from az account show in the Azure CLI 2.0.
AZURE_CLIENT_ID: Use the appId value from the output taken from a service principal output.
AZURE_CLIENT_SECRET: Use the password value from the service principal output.
AZURE_TENANT_ID: Use the tenant value from the service principal output.
- Remember, you created the console java app in the prerequisites section above, open that maven project and edit the pom.xml file as below.
<dependency>
    <groupId>com.azure</groupId>
    <artifactId>azure-messaging-servicebus</artifactId>
    <version>7.0.0</version>

</dependency>- We are using Eclipse editor to write the java code. So, need to install the Azure toolkit for eclipse. Follow the steps below.
- Select the Help menu, and then select Install new software.
- In the Work with box, enter
http://dl.microsoft.com/eclipse/and select Enter. - Select the check box next to Azure toolkit for Java. Clear the check box for Contact all update sites during install to find required software. Then select Next.
- This will now install the Azure toolkit
Great . Now you have all the pre-requisites to go ahead with Java sample code. Refer below the sample code to send the messages to queue.
import com.azure.messaging.servicebus.*;
import java.util.Arrays;
import java.util.List;

public class HelloWorld {
    static String connectionString = "<your connection string>";
    static String queueName = "<your queue name";
    public static void main(String[] args){
    	sendMessagetoServiceBus();
    }

    static void sendMessagetoServiceBus()
    {

        ServiceBusSenderClient senderClient = new ServiceBusClientBuilder()
                .connectionString(connectionString)
                .sender()
                .queueName(queueName)
                .buildClient();
        System.out.println("Sent a single message to the Azure Service Bus queue: " + queueName);
    }

  }
below is the pom.xml
<?xml version="1.0" encoding="UTF-8"?>
<project xmlns="http://maven.apache.org/POM/4.0.0"
         xmlns:xsi="http://www.w3.org/2001/XMLSchema-instance"
         xsi:schemaLocation="http://maven.apache.org/POM/4.0.0 http://maven.apache.org/xsd/maven-4.0.0.xsd">
    <modelVersion>4.0.0</modelVersion>

    <groupId>com.eduwebmonster</groupId>
    <artifactId>serviceBusProject</artifactId>
    <version>1.0-SNAPSHOT</version>


    <dependencies>
        <!-- https://mvnrepository.com/artifact/com.azure/azure-messaging-servicebus -->
        <dependency>
            <groupId>com.azure</groupId>
            <artifactId>azure-messaging-servicebus</artifactId>
            <version>7.0.0</version>
        </dependency>

    </dependencies>
</project>
Now, execute the java code using the Run as – > Java application in editor and you will see below output.
SLF4J: Failed to load class "org.slf4j.impl.StaticLoggerBinder".
SLF4J: Defaulting to no-operation (NOP) logger implementation
SLF4J: See http://www.slf4j.org/codes.html#StaticLoggerBinder for further details.
Sent a single message to the Azure Service Bus queue: firstqueue
In Azure portal, you will see screen like below.

You can see that , In the Message counts section, you have one active message. This message is received by the queue sent by the java console application.
Great, we have now successfully created the azure service bus queue and sent the messages.
Conclusion:
In this post, we have seen, how we can programmatically send the messages to the Azure service bus queue using Java and Azure SDK. This is just the sample code to show you the end-to-end flow. You can consider this as base fundamental to develop more complex application and business functionalities using Azure SDK and Java . Thank You.
My brother suggested I might like this web site. He was entirely right. This post actually made my day. You cann’t imagine just how much time I had spent for this info! Thanks!
Pingback: language agnostic - Why would you use a message based system? - Code Utility - Code Utility
Wow! This blog looks just like my old one! It’s on a totally different topic but it has pretty much the same page layout and design. Superb choice of colors!
You completed certain fine points there. I did a search on the theme and found a good number of folks will go along with with your blog. Brock Grohoske
Way cool! Some very valid points! I appreciate you penning this article plus the rest of the website is really good. Wilbert Huguenin